
|
Return to Main Menu |
|
When I started designing my hooves, I decided I wanted something as realistic as conveniently possible. Therefore it had to be hard: hard enough to actually bear
weight in fact, although I'm not advocating this project as an experiment in quadrupedal movement!
I've been using a commercial product called Milliput for many years now (in fact, when I first wrote this page you couldn't get the stuff online!). It's a versatile two-part epoxy putty, available in different grades. I used the terracotta type. Each packet contains two plastic-wrapped sticks of putty that you mash together and kneed for about five minutes. You then have a sticky, clay-like material which will stay malleable for half an hour or so. It dries solid in a few hours and cures in a few hours more. Whilst still wet, you can sculpt it like clay. Once dry it may be drilled, sanded, sawn, and painted. It adheres to almost any material and will even set under water. It's good stuff! 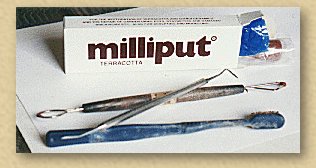 Fig 3. There are probably many other similar materials that could be used, but this may require some experimentation: you don't want anything that will be too brittle. Milliput (at the time of writing) can be had at about Ł2.00 to Ł2.50 per packet (actually, as it was three pounds ten years ago, its cost effectiveness has improved immensely!) and I needed about five packets per hoof. The putty will be formed over a wire armature or framework. For this I used galvanised steel wire of 1.5 to 2mm thickness (roughly two to three 32nds of an inch), which you can get from good gardening and hardware stores or it may be purchased online. You can usually buy a coil of several meters length and this will be more than adequate: I used little more than half a metre (2ft) per hoof, if that. Having a little excess means you can happily experiment and it doesn't matter if you make a mistake. This stuff is stiff, and it helps greatly to have two pairs of pliers to make the tighter bends with, as well as cutting it. To secure the wire together, I chose to solder them. While a little care is needed, this is not difficult. Ordinary electronics solder will do, and any old electric or gas soldering iron - but NOT one you will be needing for electronics work in the future! This is coarse grade soldering and will probably ruin the tip. Cheap 'junior' soldering irons are perfect. It is also very useful to have some kind of hobbyist's clamp to hold the wire while you solder it. I have a device called "Helping Hands" which consists of two crocodile clips on poseable arms: invaluable for any kind of modelling. When soldering, it will also make things much easier if the wire is rubbed down with emery cloth too: the solder will adhere much more readily. The final ingredient is a little different: a pair of socks! These will disguise the join between your hands and the top of the hoof. You can use any old pair, or you may want to buy some specially. A variety of textures and colours are available. It is worth noting that the thicker varieties also add some cushioning against the hardness of the hoof itself. A good strong glue such as Evostick or Araldite will be needed to attach the socks to the hoof. It should go without saying that you will need a good clear work surface, and one you don't mind getting smeared with putty or splashes of solder! |

|
Back |
|
Next |